Hello and happy Sunday!^_^
Lately I have become fascinated and quite obsessed with fabric prints, to
be more precise with printing by hand! I got my hands on these wonderful
books (below) which provide very detailed tutorials and/ or are full of inspirations!
If you are interested in hand printing and trying different techniques it's really worth getting PRINTING BY HAND by Lena Corwin. Each and every method is thoroughly explained here.
MASTERING THE ART OF FABRIC PRINTING AND DESIGN focuses mostly on digital printing and teaches how to design your own fabrics. Both VERY lovely books!
I’d done screen printing in the
past at college and I missed not doing it so today I decided to prepare my
own stencils and a screen frame and do some hand printing in the comfort of my own
home!
Materials needed:
-old wooden frame,
- polyester mesh/ finely woven polyester lining fabric
-staple gun
-textile paint/ water based fabric screen printing ink
-self- healing mat
-Mylar paper
-freezer paper
-utility knife
- old plastic card
-masking tape
- cotton/ linen fabric
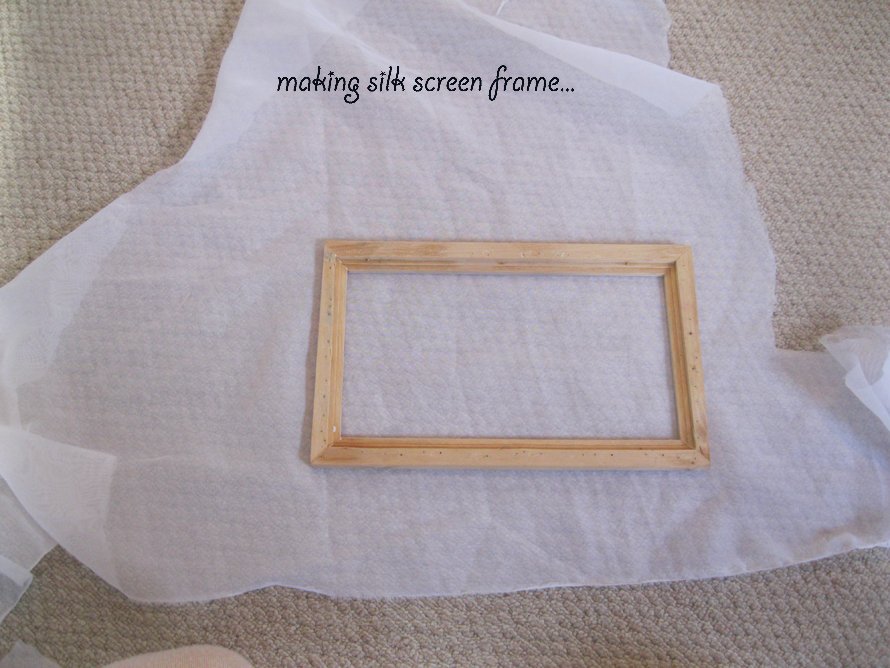
First I’ll be making my own screen frame!
I used an old wooden frame that I bought from a charity shop for £1.5
and then got a piece of finely woven polyester lining fabric (that was lying
around in my studio and did a great job! You would usually use 12xx/ 120
polyester mesh which was quite expensive so am glad my lining worked!) Then I
tightly stretched the fabric over the frame and stapled using staple gun (It’s
one scary tool I have to say! Be extra careful when using it!)
And the screen frame is now ready!
Next step is to make a stencil. I’ve tried these two:
Freezer paper stencil- you can
directly draw the design on to the paper and then cut it out with a utility
knife and iron to the right side of your fabric with its glossy side facing
down using medium-high iron setting. When you are done printing just peel it
off.
This one is much easier to cut and the final cut out design may look
much neater but the downside is you can only use it once.
Mylar stencil- first draw a
design on a piece of paper, then place it underneath the Mylar and tape the
sheets together with masking tape to a self- healing mat, cut the design out of
both sheets at the same time. Now you would need to apply an adhesive (such as
spray mount or dry mount) to hold a Mylar firmly in place. I didn’t have any adhesive.
I taped the stencil in place which may cause some ink to bleed under it as it
doesn’t lie firmly against the printing surface.
(Note: it did bleed a tiny bit so I will definitely need to get some
adhesive for my next project!)
The good thing about Mylar is that it can be reused.
Now it’s time to print!
Apply ink to screen, drag
it down the screen with your old plastic card and push it up the screen to make
sure the paint has been applied evenly.
 |
| Mylar stencil after printing.. |
Remove the frame. (Wash the frame straightaway otherwise the mesh will be ruined when the ink dries!!)
I printed two different designs and then added final touches with a brush. Wait
for the ink to dry before starting next print.
When the ink has completely dried iron both sides of the fabric to fix the design. It
can now be machine washed in 40 degrees.
Below is my first small sample, iron fixed and machine washed. All looked fine!
I really liked my final design so decided to make a small tea towel by
neatly folding and pressing the edges then stitching.
Oh! How much I've enjoyed it!!^_^
If you decided to
follow my tutorial please share the designs, I would love to see them!
Gosia
xxx